WE SELL OUR PRODUCTS ALL OVER THE WORLD

10 or More

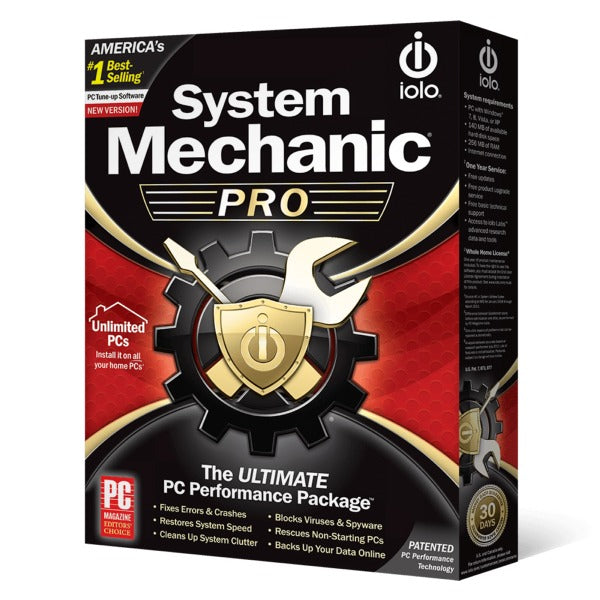
IOLO System Mechanic Pro Unlimited PC / 1 Year Unique Global Activation Code 2020


Product Description

This product is compatible with the following Operating Systems:


IOLO System Mechanic Pro 

Blocks Malware
Certified anti-virus/anti-spyware blocks the latest threats using advanced dual-engine security.

Protects Privacy
Safely and permanently removes your most sensitive files with military-grade data wiping technology.

Recovers Data
Retrieves many lost and accidentally deleted files including photos, videos and documents.

Removes Bloatware
Identifies unwanted startup programs that slow you down by launching and running without your knowledge.

Boosts Speed
Automatically increases the speed and availability of CPU, RAM and hard drive resources when you launch high-demand apps for the smoothest gaming, editing and streaming.

Repairs Problems
Finds and fixes over 30,000 different problems using intelligent live updates from iolo Labs™ to keep your PC stable and error-free.

Unleashes Internet Speed
Automatically optimizes hidden Windows Internet settings for faster downloads, snappier page loads, less buffering, improved video quality and smoother gaming.

Cleans Out Clutter
Removes over 50 types of hidden junk files to free up valuable disk space and make more room for your documents, movies, music and photos.


System Requirements

Operating System

Windows® 10, 8.1, 8, 7


    Installation Guide


    • STEP-BY-STEP INSTRUCTIONS


      1. If you have not already done so, download the System Mechanic Professional download manager. This will ensure that you are installing the most current version of the product. Save the file to a location on your system that you can easily locate. Double-click the smpro_dm.exe file to begin downloading the software. If an Open File - Security Warning window appears, click Run to begin the process.
      2. When your download is complete you will be asked, Before installation begins, would you like to save a copy of the Sytem Mechanic installation file to your computer? Click No to immediately begin installing System Mechanic Professional, or click Yes to select a location to save the installation file, then click Save to continue.
      3. The Welcome to the System Mechanic Professional Setup Wizard screen appears. Click Next to begin the installation.
      4. The License Agreement screen appears. After reading the agreement, select the I accept the agreement option and click Next to continue.
      5. The Select Installation Mode window appears. Select the option that applies to you and click Next.
      6. step 4  select I own System Mechanic and can enter my serial number later you will be taken to the Enter your license information screen.  Enter your Activation Key and email address, then click OK.

      7. The Select Destination Location screen appears. Usually, the default directory is fine unless you must install to a different drive. Click Next.
      8. The Select Components screen appears. Select the additional components that will be installed with System Mechanic Professional. Click Next.
      9. The Select typical or custom settings screen appears. Select Customize installation settings to continue choosing the details of the installation, or select Use typical settings to complete the installation now with settings appropriate for most users. Click Next. If you have selected Use typical settings, skip to step 17.
      10. The Select Start Menu Folder screen appears. To install shortcuts to the default folder, click Next.
      11. The Internet Connection screen appears. Specify the connection type that applies to you, click Next.
      12. The ActiveCare Reports screen appears. If you would like to receive notifications when new ActiveCare reports are available, enter your email address in the Send notifications to the email address field. If you do not wish to use this feature, clear the Send me an email when a new ActiveCare report is ready for viewing box. Click Next.
      13. The Select Additional Tasks screen appears. From here you can create desktop and Quick launch icons. When you are done, click Next.
      14. The Ready to Install screen appears. Make sure the information is correct. If the information is incorrect, click Back and correct the information. If it is correct, click Next and the installation will begin.
      15. To finish the installation, your PC may need to be restarted. Select Yes to restart now or select No to restart later. Click Finish.


      Congratulations! You are now ready to use System Mechanic Professional.


    Delivery Time

    The Delivery Time for Home Products is up to a business day (mostly same business day), for Business Products it is up to 3 business days. We will send the code via email that you have provided when you ordered the product.


    Product Description

    This product is compatible with the following Operating Systems:


    IOLO System Mechanic Pro 

    Blocks Malware
    Certified anti-virus/anti-spyware blocks the latest threats using advanced dual-engine security.

    Protects Privacy
    Safely and permanently removes your most sensitive files with military-grade data wiping technology.

    Recovers Data
    Retrieves many lost and accidentally deleted files including photos, videos and documents.

    Removes Bloatware
    Identifies unwanted startup programs that slow you down by launching and running without your knowledge.

    Boosts Speed
    Automatically increases the speed and availability of CPU, RAM and hard drive resources when you launch high-demand apps for the smoothest gaming, editing and streaming.

    Repairs Problems
    Finds and fixes over 30,000 different problems using intelligent live updates from iolo Labs™ to keep your PC stable and error-free.

    Unleashes Internet Speed
    Automatically optimizes hidden Windows Internet settings for faster downloads, snappier page loads, less buffering, improved video quality and smoother gaming.

    Cleans Out Clutter
    Removes over 50 types of hidden junk files to free up valuable disk space and make more room for your documents, movies, music and photos.


    System Requirements

    Operating System

    Windows® 10, 8.1, 8, 7


      Installation Guide


      • STEP-BY-STEP INSTRUCTIONS


        1. If you have not already done so, download the System Mechanic Professional download manager. This will ensure that you are installing the most current version of the product. Save the file to a location on your system that you can easily locate. Double-click the smpro_dm.exe file to begin downloading the software. If an Open File - Security Warning window appears, click Run to begin the process.
        2. When your download is complete you will be asked, Before installation begins, would you like to save a copy of the Sytem Mechanic installation file to your computer? Click No to immediately begin installing System Mechanic Professional, or click Yes to select a location to save the installation file, then click Save to continue.
        3. The Welcome to the System Mechanic Professional Setup Wizard screen appears. Click Next to begin the installation.
        4. The License Agreement screen appears. After reading the agreement, select the I accept the agreement option and click Next to continue.
        5. The Select Installation Mode window appears. Select the option that applies to you and click Next.
        6. step 4  select I own System Mechanic and can enter my serial number later you will be taken to the Enter your license information screen.  Enter your Activation Key and email address, then click OK.

        7. The Select Destination Location screen appears. Usually, the default directory is fine unless you must install to a different drive. Click Next.
        8. The Select Components screen appears. Select the additional components that will be installed with System Mechanic Professional. Click Next.
        9. The Select typical or custom settings screen appears. Select Customize installation settings to continue choosing the details of the installation, or select Use typical settings to complete the installation now with settings appropriate for most users. Click Next. If you have selected Use typical settings, skip to step 17.
        10. The Select Start Menu Folder screen appears. To install shortcuts to the default folder, click Next.
        11. The Internet Connection screen appears. Specify the connection type that applies to you, click Next.
        12. The ActiveCare Reports screen appears. If you would like to receive notifications when new ActiveCare reports are available, enter your email address in the Send notifications to the email address field. If you do not wish to use this feature, clear the Send me an email when a new ActiveCare report is ready for viewing box. Click Next.
        13. The Select Additional Tasks screen appears. From here you can create desktop and Quick launch icons. When you are done, click Next.
        14. The Ready to Install screen appears. Make sure the information is correct. If the information is incorrect, click Back and correct the information. If it is correct, click Next and the installation will begin.
        15. To finish the installation, your PC may need to be restarted. Select Yes to restart now or select No to restart later. Click Finish.


        Congratulations! You are now ready to use System Mechanic Professional.
       

      Delivery Time

      The Delivery Time for Home Products is up to a business day (mostly same business day), for Business Products it is up to 3 business days. We will send the code via email that you have provided when you ordered the product.


      Related Items